COMPUTER TRICKS

Know more about computers and Optimize it

MOBILE TRICKS

Mobile Tips Tricks and hacking

INTERNET TRICKS

Know the hidden things about internet

MULTIMEDIA

PC GAMES

Download pc games

SOFTWARE

Showing posts with label software. Show all posts

Tuesday, March 17, 2015

Download Windows 10 Technical Preview ISO


Product key: NKJFK-GPHP7-G8C3J-P6JXR-HQRJR


Follow these steps to download Technical Preview:
  • Sign up for the Windows Insider Program, if you haven't already.
  • Click one of the Download links on this page to download a special file—it's called an ISO file—that you can use to install the preview.
  • When the download is complete, transfer the ISO file to installation media such as a USB flash drive or DVD.
  • Double-tap or double-click setup.exe from the installation media, and then follow the steps


EditionsLink to downloadSHA-1 hash value
Windows 10 Technical Preview (x64)
 Download (3.92 GB)  
6A95316728299D95249A29FBEB9676DED23B8BEB
Windows 10 Technical Preview (x86)
 Download (3.01 GB)  
1AE10947CC297AE299E1C81F95812EFBB5C84121

Saturday, March 24, 2012

Download Real Desktop Standard 1.73 ML


Real Desktop Standard 1.73 ML


Real Desktop Standard 1.73 ML | 8.4 MB


Real Desktop gives your ordinary desktop new life and turns it into a Real Desktop. Enjoy the fascinating dynamics with revolutionary graphic rendition on your desktop. Get any designs from our website or create your own personal style.

Features Real Desktop:
• Automatically deploy icons in the normal position
• Change the size of icons
• Dynamically emerging names and file names
• Hide and show the file names
• Display icon in the right
• Move halyards straight into the folder
• Save position icons
• Drag & Drop
• Support for multiple monitors
• Three-dimensional sound
• Support for anti-aliasing (Antialiasing)
• Reflections on the surfaces
• Several types of baskets
• Different themes
• Select any image to display the picture on the wall
• Different backgrounds and styles to icons
• Different Pictures on the wall
• Advanced lighting settings

Download

Sunday, March 18, 2012

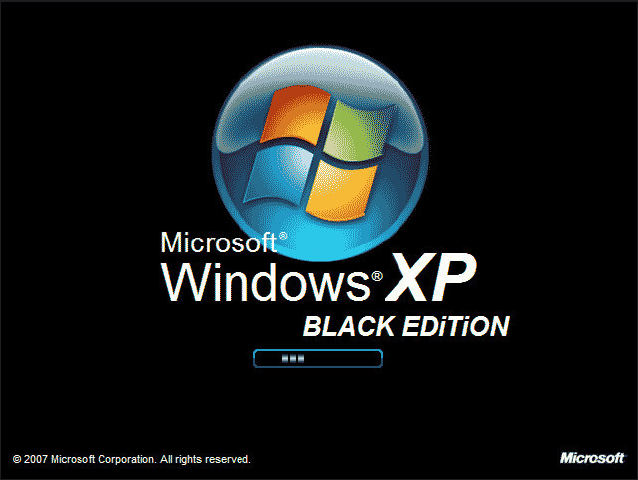
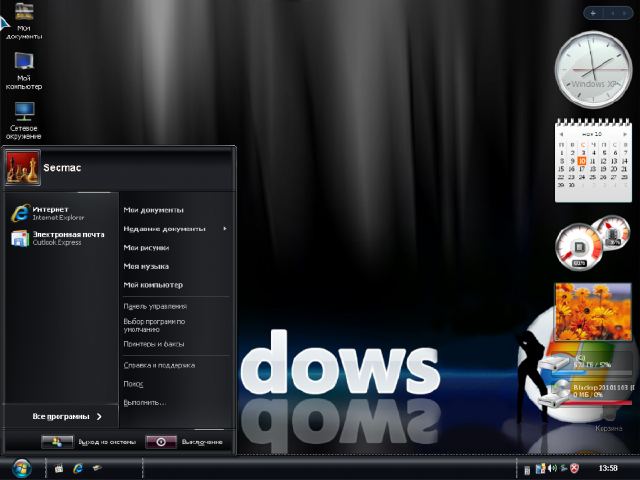
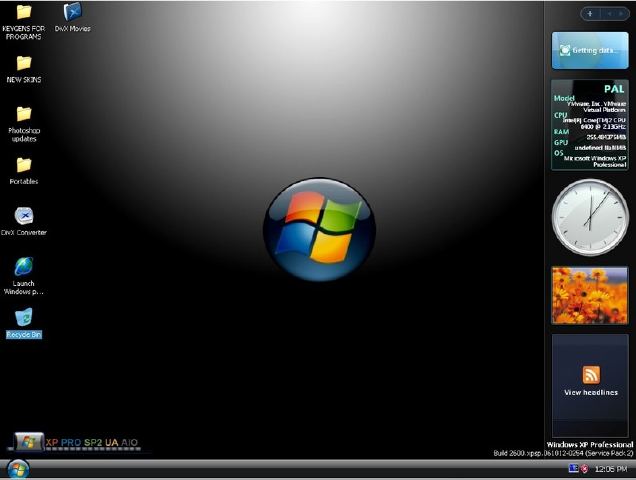
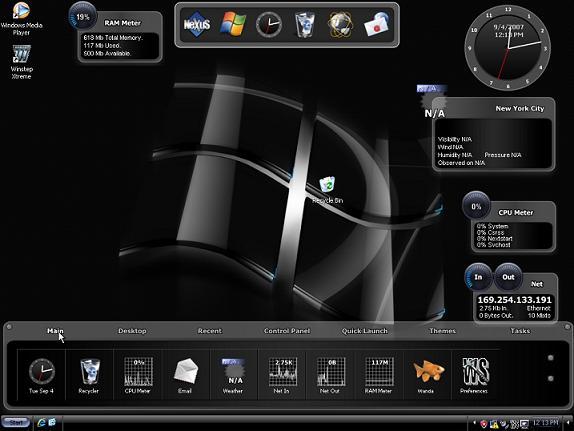
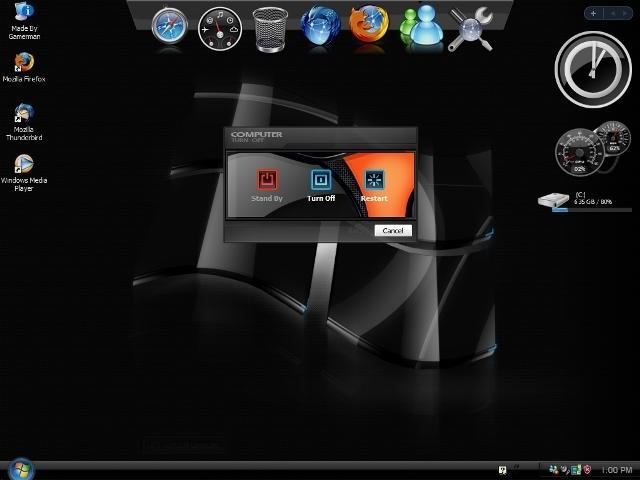
Windows XP Professional SP3 Black Edition 2012.3.17 Download


Windows XP Professional SP3 Black Edition 2012.3.17

Windows XP Professional SP3 Black Edition 2012.3.17 | 627 MB
Letitbit & Vip-File

General Info:
* This is the original Windows XP Professional SP3 32-bit (Volume License) ISO from Microsoft.
* The installation process is Unattended with the Prompt repair option.
* This Windows XP is updatable a Valid WGA CD-Key is already inserted and a WGA crack will be also installed and a Windows XP Activation is not required.
* Includes all official and some unofficial Windows XP Service Pack 3 Updates till 14.3.2012.
* Over 200 MB integrated drivers for SATA/ACHI, LAN, WLAN and Monitors.
* A lot of Windows XP settings have been already set and are also set for new created Windows XP accounts.
* Includes a Codec Pack that will decode and encode almost every Audio and Video file format.
* Booting and Running a little bit faster because some worthless Windows XP files and Programs are removed and all the Windows XP Updates are slipstreamed.
* After the Windows XP installed you can choose if you want the Preconfigured Settings and the Extra Programs to be implemented, When nothing was selected after 60 seconds then the option Yes will be automatically selected.

Windows XP Professional SP3 Black Edition 2012.3.17 Windows XP Professional SP3 Black Edition 2012.3.17


Changelog 2012.3.17:
* Updated DriverPack MassStorage form "v12.01" to "v12.03".
Updated DriverPack WLAN from "v11.09" to "v12.02".
Updated Flash Player ActiveX Control form "v11.1.102.62" to "v11.1.102.63". * Updated Microsoft Runtime Visual C-family v10.
Updated Windows XP Root Certificates Update (KB931125) from "Version November 2011" to "Version February 2012".
* Updated Tweak "Suppressing
Microsoft Update nagging to install Windows Malicious Software Removal Tool (KB890830)" from "v4.5.5900" to "v4.6.6000".
* Integrated all Windows XP Service Pack 3 Updates form 15.2.2012 till 14.3.2012.

Windows XP Professional SP3 Black Edition 2012.3.17 Windows XP Professional SP3 Black Edition 2012.3.17 Windows XP Professional SP3 Black Edition 2012.3.17

 Download

Wednesday, March 14, 2012

Firefox 11 available for download now, officially


Afew days back, we talked about Firefox 11, the latest version of the popular browser being available for download unofficially. As with most Firefox releases, the final release binaries are hidden away on the FTP, a few days before the official launch date. The official launch date is here and those wanting to upgrade their browsers can do so, today. There have been some minor issues, which seem to have been rectified. First, there was a critical security bug that needed to be fixed, but that has been done in time. There were worries that the official launch date would be missed due to this security hole being discovered at the last moment. Another issue was Microsoft’s Patch Tuesday, where Microsoft releases security updates for their operating systems.
Finally available for download
Officially here!


The launch of Firefox 11 was clashing with Patch Tuesday, so Mozilla decided to launch the browser as a manual download only. Once Microsoft is done releasing patches, Mozilla will then enable the auto download feature for the new update. This is likely to take a day or two after which Mozilla will be aware of the impact of Patch Tuesday. This was mentioned in a post by Johnathan Nightingale, Senior Director of Firefox Engineering. There’s also some caution over future Firefox downloads and Mozilla wants to avoid releasing updates on Firefox because of these issues.

The next major Firefox release - version 12 isn’t too far away, the beta is already available for download and the final release is expected to be available for download on the 24th of April 2012, just weeks from now. Those wanting to try out the Beta version of Firefox 12 can find download links here. Firefox 11 brings along a bunch of new features and a ton of bug fixes. The new features, include synchronization features for Google Chrome to users can move settings and bookmarks to Firefox easily. There are also new developer tools, such as the 3D Page Inspector, which allow developers to look at parts of the pages in 3D.


Tuesday, March 13, 2012

Download Avast Antivirus 6 with free license key Active Until 2038

                                                         Screenshot Before Entered License Key


                                                         Screenshot After Entered License Key


Here is the Avast Antivirus 6 License Key for up-to 26 years validity.


License Key: W6754380R9978A0910-4TZ59467


Avast Antivirus is the best one, click on the below link to download the Latest version of Avast Antivirus and then apply the given License Key below


The Avast Free Antivirus Active Until 2038.


Saturday, March 10, 2012

How To Run Google Chrome OS From A USB Drive [Windows]


Just a few days ago, Google announced the release of the Chrome OS source code. Within less than 24 hours, the web was littered with disk images for running the new OS on virtual machines such as VMWare and VirtualBox. I even managed to put together my own Google Chrome OS download in the form of a complete VirtualBox appliance. I’m pleased to announce that I’ve taken it a step further, and now you can easily try it on your own computer from a USB thumb drive.

Before You Get Started

Before you decide to download Chrome OS, there are probably a few things I should tell you about it. It is in the very early stages of development, so there is still a lot of stuff that doesn’t work. In fact, it may not work for you at all.
You should also be made aware that this operating system is very simplistic by design, as it is intended for use on netbook computers. By definition, a netbook is a small and inexpensive laptop intended for very casual use such as web browsing and simple office tasks. When you launch Chrome OS, pretty much all you get is a web browser. Don’t be surprised if you go through all this and say to yourself, “I did all that work just to log into a freakin’ browser?”

Requirements

First of all, you will of course need a USB drive you can use to try it out. The disk image is 2,988,442,112 bytes, so you’ll probably need a 4GB thumb drive to be able to use it. If you have any files on your USB drive that you need, be sure to back them up to a safe place because this will wipe all the data from your USB drive. Consider yourself warned.


You will also need a computer that allows booting from a USB drive. You’ll need to instruct your computer’s BIOS to boot from the USB drive instead of the hard drive like it normally does. When you boot up your computer, it should provide you with information as to how to bring up a boot menu. On some machines it is the F8 key and others the F12 key or some other key.
If it all scrolls by too fast, some computers will allow you to pause the boot sequence by pressing the Pause key. That should give you all the time you need to read all that stuff on the screen to see if you can find out what the boot menu key is (if there is one). If you don’t see anything about a boot menu, you could also try editing your BIOS settings to boot from the USB drive. You may wish to consult your computer (or motherboard) manual on how to do this.
You will also need a little bit of luck. Chromium OS may or may not work on your computer hardware. I did successfully run it on two home-built frankenstein computers (with ASUS motherboards), but it did not successfully recognize the network adapter on my Dell laptop. All of this work may be for nothing, if it ends up that Chromium OS does not like your network adapter. Ah yes, I forgot to mention that you do also need a computer with a network adapter.
Finally, you’ll need to download the necessary files to put Chromium OS (that’s what the open source version of Google Chrome OS is called) onto your USB drive. I’ve packaged it all together in a torrent for you:
You’ll need a good BitTorrent client like ÂµTorrent to download it. If you’re new to BitTorrent, be sure to check out our Big Book of BitTorrent. You’ll learn more than you’ll ever want to know about it.
The torrent has a zip file that includes the disk image, as well as a Windows tool for putting the image onto a USB drive. The program you’ll use to create the Chrome OS USB boot disk is called Image Writer for Windows. It’s a nifty little tool for writing disk images, it’s free, and it’s open source.
You don’t need to download it seperately because I’ve already included it in the torrent. I just wanted to mention the good folks that developed the great application and send them some link love as well.

Installing Chromium OS to your USB Drive

Unzip chrome_os_usb.zip, and launch Win32DiskImager.exe. If you need a program to unzip the archive, you can download IZArc. If you get the warning below when you launch Image Writer, don’t sweat it. It’s looking for a floppy disk that’s not there.
Once you’ve got Image Writer running, click the folder icon and select the chrome_os.imgfile (it should be located in the same place where you extracted the zip file and launched Win32DiskImager.exe).
Connect your USB drive to your PC. If you have autorun enabled, you may want to wait a few seconds for your computer to do its thing. Just close whatever window may pop up. Next, click on the Device dropdown and select the drive letter that corresponds to your USB drive. Then, click Write and the program will commence writing the disk image to your USB drive.

Boot Up Chromium OS

You’re now ready to boot up Chromium OS! You can just leave the USB drive in your machine and reboot it. When the machine boots, press the boot menu key on your keyboard. Select your USB drive from the menu. In about 10 seconds or so, you should see the Chromium OS login screen.
Download Google Chrome OS
Login with chronos and password. This will log you in as a local user. Once you log in, you should see what looks almost just like the Google Chrome browser. If you click on the Chrome sphere in the upper left corner, you should see a Google Accounts login page telling you to log into Welcome. Log in with your Google Account.
chromium-os-welcome-login
If you do not see this page and you get a browser page that says it could not find the page requested, then unfortunately luck is not on your side. It means that Chromium OS doesn’t like your network adapter. You could still however try it out in a virtual machine if you so desire. If you were able to succesfully log in, you should then see the application page.
google chrome os download
As you can see, it is all in the cloud. All the applications you see on the app page bring up different webpages, and everything you do takes place within the browser. In my experience, although it did boot up relatively fast, the browser tends to run a bit slow and is a bit jumpy. Although the calculator and notepad launch properly in little popover windows, the apps don’t work and nothing loads into the windows at all.
The To-do List application doesn’t work either, and you get a Google.com account login page. Note, this is not the same as a Google Accounts login so you won’t be able to log in with your Google Account. The Google.com login page is only for Google employees. The Contacts application brings up a Google Talk gadget that doesn’t appear to work.
As I said earlier, a lot of the stuff isn’t working right. You’ll also see right at the top of the application page a message that says UI under development. Designs are subject to change.
All the other applications are simply links to webpages. One thing that I found rather amusing is that when you click on the Hotmail icon, it takes you to Gmail. However, the Yahoo! Mail icon does indeed bring you to the Yahoo! Mail login page. I suppose Google likes Yahoo! better than they do Microsoft.
So what do you think of Chrome OS? Do you think it is the netbook operating system of the future?


Tuesday, February 14, 2012

Download Kaspersky 2012 AntiVirus With Key


Kaspersky 2012 AntiVirus DC02022012

Kaspersky 2012 AntiVirus DC02022012 | 155 Mb


Kaspersky Anti-Virus 2012 is the backbone of your PC’s security system, delivering real-time protection from the latest malware and viruses. It works behind the scenes with intelligent scanning and small, frequent updates, while proactively protecting you from known and emerging Internet threats. Enjoy essential protection that won’t slow you down with Kaspersky Anti-Virus 2012!

Kaspersky Anti-Virus 2012 – the backbone of your PC’s security system, offering real-time automated protection from a range of IT threats:

Real-time protection against viruses and spyware Improved!
Scanning of websites and emails for malicious code Improved!
Protection for your digital identity at all times Improved!
Vulnerability scan and treatment advice
Easy-access Desktop gadget New!

Key Features

Kaspersky Anti-Virus 2012 offers a number of new and improved features together with unique protection technologies to address the latest online threats, keeping your PC running smoothly and customize protection according to your activities:

Improved: Rescue CD disinfects the system after malware attacks
Improved: Advanced antimalware technologies even allows installation on infected PCs
Heuristics-based analysis monitors, restricts and blocks suspicious program behavior
New: Easy-access Desktop gadget for quick access to program features and settings whenever you need them

Home:


Download:

DOWNLOAD KEY

    Torrent Mirror: Kaspersky 2012 AntiVirus DC02022012 

Monday, February 13, 2012

Hack Facebook Accounts & Spy Girl Friend - My Secret Method Exposed

Well, If you are a regular reader or my "hack Facebook accounts" blog, then you don't need any introduction for this blog and of course about me also. But if you are new to this blog then I ow a right to introduce myself here at this platform.

My Name is Krishna Parmar, and I just passed my 15 years. Today I Am Going To Expose My Secret Method That I Used To Hack Thousands Of Facebook Accounts after my short introduction.

Yes, I am Hacker. In fact not actually a hacker but a "Lord of Facebook Account Hacker" You might say or think that what kind of egoist I am sounding, but the reason behind i pronounced my self as Lord is because I made a record of hacking more than 10 thousand Facebook Accounts with in passed six months. This title was given to me by my school, because I did something extra-ordinary in hacking, and hacked 2650 students FB Accounts along with Principal and Teachers. This news was also published in Local News Paper. But I was honored for hacking those accounts, as I am Ethical Hacker which hacks account for good purpose.

Today I created this mega-article as I have no further time to post articles on "How To Hack Facebook Accounts" so I thought to post this article and stay away for some time.

My Secret Method Of Hacking Thousands Of Facebook Account

Not seeking your more time, I am directly into my secret method, its all about a bursting spy hacking software that I always use to hack any account. And that is Sniperspy.

SniperSpy is one of the best hacking remote keylogger which has the ability to hack into any Computer and thus Hacking Facebook Accounts or any other email accounts like Gmail, Yahoo, Hotmail, etc

Moreover, SniperSpy can even hack the bank account login details, this is very explosive hacking software that creates a virus and no anti-virus in the world can detect that spy virus created. That virus has the ability to spy any computer and to hack any account.

What is Keylogger?

First, I need to clear this basic doubt about keylogger, it is an hacking software which creates an secret spying virus, you just need to send this virus in any form to the victim, as soon as he/she receives this virus, they are hacked. Their whole computer is in our eye-access. :)


SniperSpy is a Spying Remote Keylogger with very High-Tech features (This software is used most of the professional Hackers). This key-logger fully works on the basis of remote-control, which means that you do not need any physical access to the victim's computer. It is so powerful that none antivirus can detect our virus created.


Features Of SniperSpy

1. SniperSpy
is Complete Remote Spying Software
2. Its 100% Invisible from any Antivirus, or any other security software
3. It Records and Logs All Keystrokes typed by victim


4. Hack Accounts - Hack Facebook Account, Hack Gmail, Yahoo, Paypal, MSN Accounts


 5. Spy Any IM Conversations .
6. Captures the full-size picture of the active window.
7. Real (Live) Time Screen Viewer
8. Remotely Control the PC like Shutdown, Restart, etc
9. It bypasses any security in the world

No Need Of Physical Access To The Victims PC(s) ! - How To Use

                                                                       You didn't require any Physical Access to the Victims Remote PC(s) to install the Spying Software. You can Hack Any Computer, Hack Any Account after getting this Spy Software.  

This Spying Software installs to the victims computer via Email. Comparing any other Spying software. Sniperspy is the best Account Hacker, Computer Hacker, or its a all rounder Hacking Software .

What Is The Need Of SniperSpy - A Complete Hacking Tool !


If you suspect that your girlfriend or boyfriend , Wife , Employee , Children , etc is cheating you? If its a yes, then SniperSpy is the perfect tool for you. Get the SniperSpy and hack any account, Spy on anyone, and get yourself undetectable. So theirs a big need for you SniperSpy

This High-Spying Account Will allow you to Hack Accounts, Spy Girlfriend, Spy Children, Spy Wife, etc in real time (absolutely live). In-short This Syping SniperSpy Software allows you to Spy anyone.


Saturday, October 8, 2011

Download Windows 8 ISOs


The Build Conference has started and Microsoft is currently streaming the keynote live on the Internet. If you have not tuned in yet you can do so in a browser with Silverlight here or in Windows Media Player by following a link on that page.
We are excited about the fact that Microsoft will release Windows 8 ISO images for users from all over the world to the public today. Everyone will be able to download Windows 8 from the Microsoft Dev website as long as they have or create a Windows Live ID to log in.
This is the only requirement to download the development release of Windows 8 today. Microsoft makes the release available as a 32-bit and 64-bit edition, and will include development tools and samples as well. This includes the Windows 8 SDK for instance and application samples.
windows 8 keynote 400x225 Download Windows 8 ISOs Right Now
The company notes that those samples are not necessarily the apps that will ship with the operating system next year when it comes out.
Windows 8 ISO images can be downloaded from the Dev Website here.  We’ve also added direct links to the download isos to our Windows 8 Download Center.
The developer preview has the build number 8102. It will ship with an early preview version (preview 3) of Internet Explorer 10 which plays a major role in Microsoft’s vision for the new operating system. Tablet users will get a special version of Internet Explorer 10 for their systems.
A new feature that will be introduced in Windows 8 is a new task manager which has been designed for end users. Professionals and experts can display a new and improved task manager as well that offers more details in a new layout.
windows task manager 400x225 Download Windows 8 ISOs Right Now
One of the new interesting features is the App History tab which details applications that have been active previously on the system and their resource usage.
Update: The Windows Developer Preview is now live. Anyone can download the 32-bit or 64-bit version from the following website: http://adf.ly/6bsTh

Friday, September 16, 2011

Create An Ftp Server On Your Pc With Serv-u


Requirements:
Serv-U
No-IP.com Website

Quote:
Step 1. Getting a static IP address.
Get a static address for your FTP server. You will want to do this as opposed to using your IP address for several reasons. First, it’s easier keeping up-to-date. Imagine having to change all of your setting every time your IP changed. With No-IP, the No-IP service runs in background on your computer and updates your current IP address with your FTP server’s URL (for example, you get ftp://rkchoolie.serveftp.com). Second reason, you don’t want your IP address posted out there for everyone to see.

1. Go to www.No-IP.com to create a new user account.
2. Fill in the information that is required and the click Register button.
3. Your account has now been created and your account password has been emailed to you.
4. Check your email mailbox and wait for the mail that contains your password
5. Go back to www.No-IP.com and type your email address and password to login to your account.
6. Once in your account, click on Add a host in the left menu
7. Type in the Hostname you want (example: rkchoolie) and pick a Domain from the list (example: ftpserve.com)
8. Check Allow Wildcards and click the Submit button
9. You now have your static address (example: rkchoolie.serveftp.com)
10. Click on your OS link in the Dyn-Update Client in the bottom right menu and follow links to download the client
11. Once downloaded, install the software and type in your email address and password when asked.
12. Finally tick the checkbox near your static address.

You now have a static web address .


Quote:
Step 2. Installing and setting the FTP server
1. Install Serv-U (download HERE)
2. Start Serv-U and use the wizard to setup your ftp.
3. Click next until you're asked for an IP address, leave it blank and then click next.
4. Type the domain name you've just registered above (example: preacher.serveftp.com) in the domain name field and then click Next.
5. You are asked if you want to allow anonymous access, select No and then click next.
6. You are then asked to create a named account, check yes and then click next.
7. Type in the user name you wish for this account (example: Harrie) and click next.
8. Type a password for this account (example: $p3c1aL). For security reasons, try to create a password with some letters, numbers and special characters. Then click next.
9. You will then be asked for the Home directory of the account you just created. Select the directory and then click next.
10. Select yes to lock this account to the Home directory. You want to do this so that the user can not go any further up that his home directory. Click next.
11. The account is now set so click finish.

Quote:
Step 3. Configuring user accounts
1. In the left tree-menu, select the account you've just created and then click on the General tab.
2. Check Hide ‘Hidden’ Files.
3. Check Allow only and enter the number one in the box.
4. Set the Max. download speed to what ever you want. If this is an account that many will be using, set it low to save on your bandwidth. I usually have mine set between 10 – 20. If you leave it blank, users will be able to download from you at full bandwidth.
5. Set the Max no. of users to how many you want to be able to log on at one time. This depends on your connection speed but try these (56 - 1, ISDN - 3, ADSL or cable - 5-6 users.)
6. Now, click on the Dir Access tab.
7. You should see the home folder in there. Highlight it and make your permissions.
8. If you only want users to be able to download check only Read, List, & Inherit.
9. If you want users to be able to upload, but to only one particular folder but not download, click the add button and then select that folder. Now highlight the folder and set these permissions on that folder. Check Write, Append, List, Create, & Inherit. Once you have made the permissions click on the up arrow that is located at the bottom right-hand corner. You want this special upload folder to be list first, before the home folder.
10. If there is a folder that you don’t want anyone to have access to, but it is inside the home folder, then click the add button and then select that folder. Now highlight the folder and make sure that all checkboxes are left. Once you have made the permissions click on the up arrow that is located at the bottom right-hand corner. You want this no access folder to be listed at the very top.
11. There are many other different sets of permissions you can play with. I just covered your basics.
12. Your server is now set!
13. Try logging on with the username and password and see if it works.

Tuesday, September 13, 2011

BULLETPROOF FTP SERVER TUTORIAL


thanks to someone for this tut.

Configuring your Bulletproof FTP Server Tutorial

I am not sure where I found this tutorial, It’s been a while…It might even have been here... ..So if it is one of yours, my hat goes off to you once again....

After reading the excellent tutorial on "Creating an FTP" that Norway posted…

(I would suggest reading and following his tutorial first, then following up with this one)

I thought that perhaps this tutorial might be pretty helpful for those interested in knowing how to configure their Bulletproof FTP Server that don't already know how... Here's how to get started…

This is for the BulletProof FTP Server 2.10. However, It should work fine on most following versions as well.

I'm assuming you have it installed and cracked.If not download HERE

Basics
1. Start the program.
2. Click on Setup > Main > General from the pull-down menu.
3. Enter your server name into the 'Server Name' box. Under Connection set the “Max number of users" to any number. This is the limit as to how many users can be on your sever at any time.
4. Click on the 'options' tab of that same panel (on the side)
5. Look at the bottom, under IP Options. Put a check in the box “Refuse Multiple Connections from the same IP”. This will prevent one person from blocking your FTP to others.
6. Also put a check in the 'Blocked Banned IP (instead of notifying client). VERY IMPORTANT! If somebody decides to 'Hammer' (attempt to login numerous times VERY quickly) your server/computer may CRASH if you don't enable this.
7. Click on the 'advanced' tab
8. At the bottom again look at the 'hammering area'
9. Enable 'anti-hammer' and 'do not reply to people hammering' Set it for the following: Block IP 120 min if 5 connections in 60 sec. You can set this at whatever you want to but that is pretty much a standard Click 'OK'

Adding Users
11. Setup > User accounts form pull-down.
12. Right click in the empty 'User Accounts' area on the right: choose 'Add'
13. Enter account name. (ie: logon name)
14. In the 'Access rights' box right click: choose ‘Add’.
15. Browse until you find the directory (folder) you want to share. In the right column you will see a bunch of checkboxes. Put a check in the following ones: Read, Write, Append, Make, List, and +Subdirs. Press 'select'.
16. Enter a password for your new FTP account.
17. Click on 'Miscellaneous' in the left column. Make sure 'Enable Account' is selected. Enable 'Max Number of Users' set it at a number other than zero. 1 for a personal account and more that one for a group account. Enable 'Max. no. of connects per IP' set it at 1

18. Under 'Files' enable 'show relative path' this is a security issue. A FTP client will now not be able to see the ENTIRE path of the FTP. It will only see the path from the main directory. Hide hidden flies as well.
Put a tick in both of these.

Advanced:
You don't need to do any of this stuff, but It will help tweak your server and help you maintain order on it. All of the following will be broken down into small little areas that will tell you how to do one thing at a time.

Changing the Port
The default port is always 21, but you can change this. Many ISPs will routinely do a scan of its own users to find a ftp server, also when people scan for pubs they may scan your IP, thus finding your ftp server. If you do decide to change it many suggest that you make the port over 10,000.
1. Setup > Main > General
2. In the 'Connection' Area is a setting labeled 'Listen on Port Number:'
3. Make it any number you want. That will be your port number.
4. Click 'OK'

Making an 'Upload Only' or 'Download Only' ftp server.
This is for the entire SERVER, not just a user.
1. Setup > Main > Advanced
2. In the advanced window you will have the following options: uploads and downloads, downloads only, and uploads only. By default upload and download will be checked. Change it to whatever you want.
3. Click 'OK’


While you are running your server, usually you will end up spending more time at your computer than you normally do. Don't be afraid to ban IP's. Remember, on your FTP you do as you want.

When you are online you must also select the open server button next to the on-line button which is the on-line Button

You also have to use the actual Numbered ip Address ie: 66.250.216.67

Or even Better yet, get a no-ip.com address


Friday, September 9, 2011

CONTROL YOUR PC WITH A BLUETOOTH ENABLED PHONE


WMouseXP Remote 3.0 Full Version

Use your JAVA Enabled mobile as Bluetooth PC Remote!

You can Control Your PC Mouse, Clicks, some Keys such as Enter, TAB, Space... etc...

Download  WMouseXP Remote 3.0.rar  extract it and install the software(just double click on WMouseXP Remote 3.0.Silent.exe it will setup automatically without any window or notification )

Install WMouseXP Edited.jar to your phone(send the file to your phone)


Run the program from Startmenu >> Programs >> System Tools >> WMouseXP Remote

Run  WMouseXP Edited.jar on your phone

Click Connect

Your Bluetooth Mouse is ready!

Enjoy!

DOWNLOAD

Twitter Delicious Facebook Digg Stumbleupon Favorites More

 
Back to TOP Creative Commons License
This work is licensed under a Creative Commons Attribution-NoDerivs 3.0 Unported License.