

COMPUTER TRICKS

Know more about computers and Optimize it

MOBILE TRICKS

Mobile Tips Tricks and hacking

INTERNET TRICKS

Know the hidden things about internet

MULTIMEDIA

PC GAMES

Download pc games

SOFTWARE

Showing posts with label Multimedia. Show all posts

Friday, October 7, 2011

Cracking Zip Password Files

        Tut On Cracking Zip Password Files..                                                    
What is FZC? FZC is a program that cracks zip files (zip is a method of compressing multiple files into one smaller file) that are password-protected (which means you're gonna need a password to open the zip file and extract files out of it). You can get it anywhere - just use a search engine such as altavista.com.
FZC uses multiple methods of cracking - bruteforce (guessing passwords systematically until the program gets it) or wordlist attacks (otherwise known as dictionary attacks. Instead of just guessing passwords systematically, the program takes passwords out of a "wordlist", which is a text file that contains possible passwords. You can get lots of wordlists at www.theargon.com.).
FZC can be used in order to achieve two different goals: you can either use it to recover a lost zip password which you used to remember but somehow forgot, or to crack zip passwords which you're not supposed to have. So like every tool, this one can be used for good and for evil.
The first thing I want to say is that reading this tutorial... is the easy way to learn how to use this program, but after reading this part of how to use the FZC you should go and check the texts that come with that program and read them all. You are also going to see the phrase "check name.txt" often in this text. These files should be in FZC's directory. They contain more information about FZC.
FZC is a good password recovery tool, because it's very fast and also support resuming so you don't have to keep the computer turned on until you get the password, like it used to be some years ago with older cracking programs. You would probably always get the password unless the password is longer than 32 chars (a char is a character, which can be anything - a number, a lowercase or undercase letter or a symbol such as ! or &) because 32 chars is the maximum value that FZC will accept, but it doesn't really matter, because in order to bruteforce a password with 32 chars you'll need to be at least immortal..heehhe.. to see the time that FZC takes with bruteforce just open the Bforce.txt file, which contains such information.
FZC supports brute-force attacks, as well as wordlist attacks. While brute-force attacks don't require you to have anything, wordlist attacks require you to have wordlists, which you can get from www.theargon.com. There are wordlists in various languages, various topics or just miscellaneous wordlists. The bigger the wordlist is, the more chances you have to crack the password.
Now that you have a good wordlist, just get FZC working on the locked zip file, grab a drink, lie down and wait... and wait... and wait...and have good thoughts like "In wordlist mode I'm gonna get the password in minutes" or something like this... you start doing all this and remember "Hey this guy started with all this bullshit and didn't say how I can start a wordlist attack!..." So please wait just a little more, read this tutorial 'till the end and you can do all this "bullshit".

We need to keep in mind that are some people might choose some really weird passwords (for example: 'e8t7@$^%*gfh), which are harder to crack and are certainly impossible to crack (unless you have some weird wordlist). If you have a bad luck and you got such a file, having a 200MB list won't help you anymore. Instead, you'll have to use a different type of attack. If you are a person that gives up at the first sign of failure, stop being like that or you won't get anywhere. What you need to do in such a situation is to put aside your sweet xxx MB's list and start using the Brute Force attack.
If you have some sort of a really fast and new computer and you're afraid that you won't be able to use your computer's power to the fullest because the zip cracker doesn't support this kind of technology, it's your lucky day! FZC has multiple settings for all sorts of hardware, and will automatically select the best method.

Now that we've gone through all the theoretical stuff, let's get to the actual commands.


--------------------------------------------------------------------------------
                                                      Bruteforce
--------------------------------------------------------------------------------


The command line you'll need to use for using brute force is:

fzc -mb -nzFile.zip -lChr Lenght -cType of chars

Now if you read the bforce.txt that comes with fzc you'll find the description of how works Chr Lenght and the Type of chars, but hey, I'm gonna explain this too. Why not, right?... (but remember look at the bforce.txt too)

For Chr Lenght you can use 4 kind of switches...

-> You can use range -> 4-6 :it would brute force from 4 Chr passwors to 6 chr passwords
-> You can use just one lenght -> 5 :it would just brute force using passwords with 5 chars
-> You can use also the all number -> 0 :it would start brute forcing from passwords with lenght 0 to lenght 32, even if you are crazy i don't think that you would do this.... if you are thinking in doing this get a live...
-> You can use the + sign with a number -> 3+ :in this case it would brute force from passwords with lenght 3 to passwords with 32 chars of lenght, almost like the last option...

For the Type of chars we have 5 switches they are:

-> a for using lowercase letters
-> A for using uppercase letters
-> ! for using simbols (check the Bforce.txt if you want to see what simbols)
-> s for using space
-> 1 for using numbers


Example:
If you want to find a password with lowercase and numbers by brute force you would just do something like:

fzc -mb -nzTest.zip -l4-7 -ca1

This would try all combinations from passwords with 4 chars of lenght till 7 chars, but just using numbers and lowercase.

*****
hint
*****

You should never start the first brute force attack to a file using all the chars switches, first just try lowercase, then uppercase, then uppercase with number then lowercase with numbers, just do like this because you can get lucky and find the password much faster, if this doesn't work just prepare your brain and start with a brute force that would take a lot of time. With a combination like lowercase, uppercase, special chars and numbers.


--------------------------------------------------------------------------------
                                                   Wordlist
--------------------------------------------------------------------------------

Like I said in the bottom and like you should be thinking now, the wordlist is the most powerfull mode in this program. Using this mode, you can choose between 3 modes, where each one do some changes to the text that is in the wordlist, I'm not going to say what each mode does to the words, for knowing that just check the file wlist.txt, the only thing I'm going to tell you is that the best mode to get passwords is mode 3, but it takes longer time too.
To start a wordlist attak you'll do something like.

fzc -mwMode number -nzFile.zip -nwWordlist

Where:

Mode number is 1, 2 or 3 just check wlist.txt to see the changes in each mode.
File.zip is the filename and Wordlist is the name of the wordlist that you want to use. Remember that if the file or the wordlist isn't in the same directory of FZC you'll need to give the all path.

You can add other switches to that line like -fLine where you define in which line will FZC start reading, and the -lChar Length where it will just be read the words in that char length, the switche works like in bruteforce mode.
So if you something like

fzc -mw1 -nztest.zip -nwMywordlist.txt -f50 -l9+

FZC would just start reading at line 50 and would just read with length >= to 9.

Example:

If you want to crack a file called myfile.zip using the "theargonlistserver1.txt" wordlist, selecting mode 3, and you wanted FZC to start reading at line 50 you would do:

fzc -mw3 -nzmyfile.zip -nwtheargonlistserver1.txt -f50


--------------------------------------------------------------------------------
                                                   Resuming
--------------------------------------------------------------------------------

Other good feature in FZC is that FZC supports resuming. If you need to shutdown your computer and FZC is running you just need to press the ESC key, and fzc will stop. Now if you are using a brute force attack the current status will be saved in a file called resume.fzc but if you are using a wordlist it will say to you in what line it ended (you can find the line in the file fzc.log too).
To resume the bruteforce attack you just need to do:

fzc -mr

And the bruteforce attack will start from the place where it stopped when you pressed the ESC key.
But if you want to resume a wordlist attack you'll need to start a new wordlist attack, saying where it's gonna start. So if you ended the attack to the file.zip in line 100 using wordlist.txt in mode 3 to resume you'll type

fzc -mw3 -nzfile.zip -nwwordlist.txt -f100

Doing this FZC would start in line 100, since the others 99 lines where already checked in an earlier FZC session.


Well, it looks like I covered most of what you need to know. I certainly hope it helped you... don't forget to read the files that come with the program

Tuesday, September 27, 2011

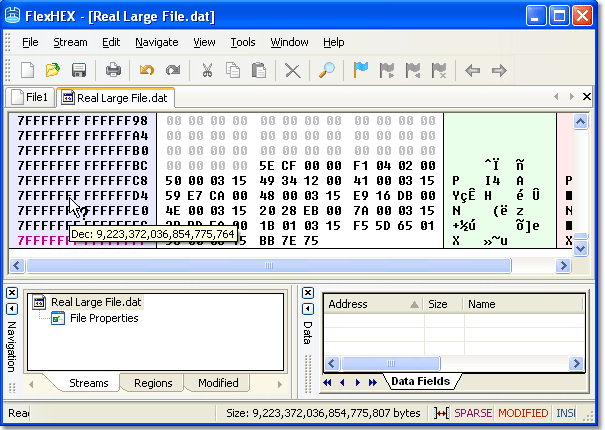
Create A Huge File


                                             CREATE A HUGE FILE                                                               

You can create a file of any size using nothing more than what's supplied with Windows. Start by converting the desired file size into hexadecimal notation. You can use the Windows Calculator in Scientific mode do to this. Suppose you want a file of 1 million bytes. Enter 1000000 in the calculator and click on the Hex option to convert it (1 million in hex is F4240.) Pad the result with zeroes at the left until the file size reaches eight digits—000F4240.

Now open a command prompt window. In Windows 95, 98, or Me, you can do this by entering COMMAND in the Start menu's Run dialog; in Windows NT 4.0, 2000, or XP enter CMD instead. Enter the command DEBUG BIGFILE.DAT and ignore the File not found message. Type RCX and press Enter. Debug will display a colon prompt. Enter the last four digits of the hexadecimal number you calculated (4240, in our example). Type RBX and press Enter, then enter the first four digits of the hexadecimal size (000F, in our example). Enter W for Write and Q for Quit. You've just created a 1-million-byte file using Debug. Of course you can create a file of any desired size using the same technique.

Thursday, September 15, 2011

A very small tutorial for RealMedia


You may find this helpful if you donwload hundreds of short episodes in rm format like me and tired of double-click to open next files.

Very easy. Use notepad to open a new file, type this inside:
file://link to file1
file://link to file2
(type as many as you want)
Close file. Rename it to FileName.rm

Then you`re done!!!!

Ex:
I put my playlist file here: C:\Movies\7VNR
And the movie files are in C:\Movies\7VNR\DragonBall

Then inside my playlist file I`ll have something like this:

file://DragonBall/db134.rm
file://DragonBall/db135.rm
file://DragonBall/db136.rm
file://DragonBall/db137.rm
file://DragonBall/db138.rm

Wednesday, September 14, 2011

Directx EXPLAINED


 DirectX explained

Ever wondered just what that enigmatic name means?

Gaming and multimedia applications are some of the most satisfying programs you can get for your PC, but getting them to run properly isn’t always as easy as it could be. First, the PC architecture was never designed as a gaming platform. Second, the wide-ranging nature of the PC means that one person’s machine can be different from another. While games consoles all contain the same hardware, PCs don’t: the massive range of difference can make gaming a headache.


To alleviate as much of the pain as possible, Microsoft needed to introduce a common standard which all games and multimedia applications could follow – a common interface between the OS and whatever hardware is installed in the PC, if you like. This common interface is DirectX, something which can be the source of much confusion.

DirectX is an interface designed to make certain programming tasks much easier, for both the game developer and the rest of us who just want to sit down and play the latest blockbuster. Before we can explain what DirectX is and how it works though, we need a little history lesson.

DirectX history
Any game needs to perform certain tasks again and again. It needs to watch for your input from mouse, joystick or keyboard, and it needs to be able to display screen images and play sounds or music. That’s pretty much any game at the most simplistic level.

Imagine how incredibly complex this was for programmers developing on the early pre-Windows PC architecture, then. Each programmer needed to develop their own way of reading the keyboard or detecting whether a joystick was even attached, let alone being used to play the game. Specific routines were needed even to display the simplest of images on the screen or play a simple sound.

Essentially, the game programmers were talking directly to your PC’s hardware at a fundamental level. When Microsoft introduced Windows, it was imperative for the stability and success of the PC platform that things were made easier for both the developer and the player. After all, who would bother writing games for a machine when they had to reinvent the wheel every time they began work on a new game? Microsoft’s idea was simple: stop programmers talking directly to the hardware, and build a common toolkit which they could use instead. DirectX was born.

How it works
At the most basic level, DirectX is an interface between the hardware in your PC and Windows itself, part of the Windows API or Application Programming Interface. Let’s look at a practical example. When a game developer wants to play a sound file, it’s simply a case of using the correct library function. When the game runs, this calls the DirectX API, which in turn plays the sound file. The developer doesn’t need to know what type of sound card he’s dealing with, what it’s capable of, or how to talk to it. Microsoft has provided DirectX, and the sound card manufacturer has provided a DirectX-capable driver. He asks for the sound to be played, and it is – whichever machine it runs on.

From our point of view as gamers, DirectX also makes things incredibly easy – at least in theory. You install a new sound card in place of your old one, and it comes with a DirectX driver. Next time you play your favourite game you can still hear sounds and music, and you haven’t had to make any complex configuration changes.

Originally, DirectX began life as a simple toolkit: early hardware was limited and only the most basic graphical functions were required. As hardware and software has evolved in complexity, so has DirectX. It’s now much more than a graphical toolkit, and the term has come to encompass a massive selection of routines which deal with all sorts of hardware communication. For example, the DirectInput routines can deal with all sorts of input devices, from simple two-button mice to complex flight joysticks. Other parts include DirectSound for audio devices and DirectPlay provides a toolkit for online or multiplayer gaming.

DirectX versions
The current version of DirectX at time of writing is DirectX 9.0. This runs on all versions of Windows from Windows 98 up to and including Windows Server 2003 along with every revision in between. It doesn’t run on Windows 95 though: if you have a machine with Windows 95 installed, you’re stuck with the older and less capable 8.0a. Windows NT 4 also requires a specific version – in this case, it’s DirectX 3.0a.

With so many versions of DirectX available over the years, it becomes difficult to keep track of which version you need. In all but the most rare cases, all versions of DirectX are backwardly compatible – games which say they require DirectX 7 will happily run with more recent versions, but not with older copies. Many current titles explicitly state that they require DirectX 9, and won’t run without the latest version installed. This is because they make use of new features introduced with this version, although it has been known for lazy developers to specify the very latest version as a requirement when the game in question doesn’t use any of the new enhancements. Generally speaking though, if a title is version locked like this, you will need to upgrade before you can play. Improvements to the core DirectX code mean you may even see improvements in many titles when you upgrade to the latest build of DirectX. Downloading and installing DirectX need not be complex, either.

Upgrading DirectX
All available versions of Windows come with DirectX in one form or another as a core system component which cannot be removed, so you should always have at least a basic implementation of the system installed on your PC. However, many new games require the very latest version before they work properly, or even at all.

Generally, the best place to install the latest version of DirectX from is the dedicated section of the Microsoft Web site, which is found at www.microsoft.com/windows/directx. As we went to press, the most recent build available for general download was DirectX 9.0b. You can download either a simple installer which will in turn download the components your system requires as it installs, or download the complete distribution package in one go for later offline installation.

Another good source for DirectX is games themselves. If a game requires a specific version, it’ll be on the installation CD and may even be installed automatically by the game’s installer itself. You won’t find it on magazine cover discs though, thanks to Microsoft’s licensing terms.

Diagnosing problems

Diagnosing problems with a DirectX installation can be problematic, especially if you don’t know which one of the many components is causing your newly purchased game to fall over. Thankfully, Microsoft provides a useful utility called the DirectX Diagnostic Tool, although this isn’t made obvious. You won’t find this tool in the Start Menu with any version of Windows, and each tends to install it in a different place.

The easiest way to use it is to open the Start Menu’s Run dialog, type in dxdiag and then click OK. When the application first loads, it takes a few seconds to interrogate your DirectX installation and find any problems. First, the DirectX Files tab displays version information on each one of the files your installation uses. The Notes section at the bottom is worth checking, as missing or corrupted files will be flagged here.

The tabs marked Display, Sound, Music, Input and Network all relate to specific areas of DirectX, and all but the Input tab provide tools to test the correct functioning on your hardware. Finally, the More Help tab provides a useful way to start the DirectX Troubleshooter, Microsoft’s simple linear problem solving tool for many common DirectX issues.


Friday, September 2, 2011

HOW TO RIP DYNAMIC FLASH TEMPLATE


What you need:                                              

Sample dynamic flash template from TM website
Sothink SWF Decompiler
Macromedia Flash
Yourself


1. browse or search your favorite dynamic flash template in TM website. If you got one... click the "view" link and new window will open with dynamic flash.. loading...

2. If the movie fully loaded, click View -> Source in your browser to bring the source code of the current page and in the source code, search for "IFRAME" and you will see the iframe page. In this example were going to try the 7045 dynamic template. get the URL(ex.
http://images.templatemonster.com/screenshots/7000/7045.html) then paste it to your browser... easy eh? wait! dont be to excited... erase the .html and change it to swf then press enter then you'll see the flash movie again icon_smile.gif.

3. copy the URL and download that SWF file.. use your favorite download manager.. mine I used flashget icon_smile.gif NOTE: dont close the browser we may need that later on.

4. open your Sothink SWF decompiler... click "Quick Open" then browse where you download your SWF/movie file. Click Export FLA to export your SWF to FLA, in short, save it as FLA icon_smile.gif

5. Open your Macromedia FLash and open the saved FLA file. press Control+Enter or publish the file... then wallah! the output window will come up with "Error opening URL blah blah blah..." dont panic, that error will help you where to get the remaining files.

6. Copy the first error, example: "7045_main.html" then go back to your browser and replace the 7045.swf to 7045_main.html press enter and you'll see a lot of text... nonsense text icon_lol.gif that text are your contents...

NOTE: when you save the remaining files dont forget to save with underscore sign (_) in the front on the file without the TM item number (e.g. 7045) if it is html save it as "_main.html" and same with the image save it as "_works1.jpg" save them where you save the FLA and SWF files. Continue browsing the file inside Flash application so you can track the remaining files... do the same until you finish downloading all the remaining the files.
   

Twitter Delicious Facebook Digg Stumbleupon Favorites More

 
Back to TOP Creative Commons License
This work is licensed under a Creative Commons Attribution-NoDerivs 3.0 Unported License.